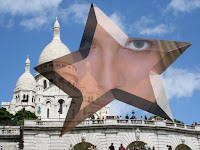
Mapping photos onto shapes is a standard for photo-based posters and memory collages. It is also a great method of creating illustrations.
First-
make any shape using the pen tool or anything from the shape library. In the pen or shape options make sure that you have the shape button selected. If you have been using paths it will be set to paths from last time. It doesn't matter what color the shape is.
Second-
Place a photo in a new layer above the shape. If you started with a photo, you can double click it to make it a layer, then drag it to the top of the stack in the layers palette.
Third-
Hold the OPTION KEY. Now scroll your mouse over the DIVIDING LINE between the two layers. the cursor changes to a symbol of two interlocking circles. Click the dividing line between the two layers. The photo is now linked to the shape and uses it as a vector mask.
Manipulation-
The image and mask can be manipulated separately. Use the move tool to manipulate the image. Use the path selection tool and direct selection tool to manipulate the mask. Use the pen tool to add, delete and alter points.
Signature style-
A special signature style of photoshop is the look of a transparent shape with an image map floating over another image. This is referred to as the "glass tile" look, and I'm sure you have seen it everywhere. Reduce the opacity of the shape layer and place another image behind it for the glass tile look.
Vectors and FX
Remember the FX palette? The FX palette works with vector shapes (although we've only used it for text, another kind of vector shape) Use the FX palette to apply a bevel to the final product. click on the fx button in the layer palette to apply the bevel. The final effect is really pleasing, and used everywhere for photo-illustration. Going for total commercial cheese? add a lens flare (filters-render-lens flare) to a star shape photo map for kitschy glamour.
